Attaching Files to your Vendor Records
Use the Attachments tab to attach files to your vendor records. For example, you can attach a W-9, a terms agreement, or any correspondence.
If you want to attach a file to multiple records or if you need to regularly update the file, you can create a custom menu instead of attaching the file to individual records.
To attach a file:
1 In Accounts Payable, select Vendor Accounts > Add / Change Accounts from the left navigation pane. The AP Vendors window will open.
Click thumbnail to view larger image.
2 Select a vendor and click the Edit button.
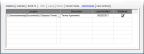
3 On the Attachments tab, use the browse button in the Location field to select the file you want to attach.
4 Enter a description of the attachment.
5 If you want to publish this file to the SQL server, select the Published check box. This will allow everyone with access to the SQL server to access the file. If you want to allow access only to users on the local machine, leave the check box unchecked.
You can double-click on any row to open the associated attachment. Use the right-click menu to delete a row, open the attachment, or unpublish the file.
When you back up your data through Denali or SQL, unpublished files will not be included.
Published date: 12/03/2021