Creating Your Vendors
You can add vendors at any time. After you establish vendors, you can use the vendor number to access vendors and sort reports.
You should plan ahead and set up a meaningful numbering system with any alphanumeric combination that works best for you. This will save you time later when you enter transactions and generate reports.
You can establish meaningful vendor groups to group vendors together by certain criteria when you print reports. One way to do this is with AP Codes, which direct the posting of invoices, payments, and adjustments to the correct General Ledger accounts . Before you create a vendor, you must establish at least one AP Code.
If you intend to enter a balance forward amount for your vendor, you must do so when you create the vendor; once you save the vendor, the option is locked and you can only change the vendor’s balance when you post transactions.
To create a new vendor:
1 In Accounts Payable, select Vendor Accounts > Add / Change Accounts from the left navigation pane. The AP Vendors window will open.
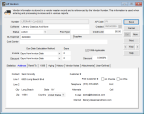
Click thumbnail to view larger image.
2 Enter a unique vendor number in the Number field.
3 Specify the AP Code for the vendor.
Enter the remaining information. See AP Vendors window for more details about the fields in this window.
4 Select Save to add this vendor to the system.
You can print a detailed list of all your vendors from the AP Vendors window by selecting the Print button or by printing the Master Vendor Report.
Published date: 12/03/2021