Tracking User-Defined Vendor Information
You might find it beneficial to track user-defined vendor information. The User-Defined tab in the AP Module Preferences window allows you to create up to ten fields to track any vendor information you choose. For example, you could set up a User-Defined Field (UDF) to show the county in which the vendor is located, which vendors give you a discount and how much, or if the vendor has a credit limit set for you. You can also use the UDFs to sort and filter certain Accounts Payable reports.
To set up User-Defined Fields:
1 In Accounts Payable, select Options > Establish User-Defined Vendor Tracking from the left navigation pane.
2 In the AP Module Preferences window, select the User-Defined Fields tab.
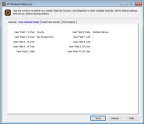
Click thumbnail to view larger image.
3 For each piece of information that you want to track, enter the heading text for the field into the correct type of UDF (Date, Amt, etc.).
Use UDF Fields 1 or 2 if you want to set up a field that you can then attach Codes to.
4 Once you enter all the User-Defined Fields you want to use, continue with your Module Preferences setup or click Save.
For information on using these fields after you set them up, see Using the User-Defined Fields After Setup.
Published date: 12/03/2021