Importing Customer Transactions
If you have customer transaction information in an external file, such as a spreadsheet, you can easily import these transactions into Denali. You can only import transactions that are formatted correctly and you can only import or generate transactions into an empty batch. If you are not in multi-batch mode, you must post or clear any unposted transactions before you can import external transactions.
Refer to Format Requirements for Importing Transactions before you import external files to ensure the files are formatted correctly. We recommend you refer to the documentation for the application you will use to export data to create a text file that meets the format requirements of Denali.
In some cases, you might need to make adjustments to the external file formats after the transactions are exported to the text file. For example, you might need to shorten the length of a field or change the date format before you import into Denali.
To import external transactions:
1 In Accounts Receivable, select Transaction Tasks > Import Transactions from an External File from the left navigation pane.
2 If you use batch processing and you are not working in an active batch, select an empty batch or create a new batch.
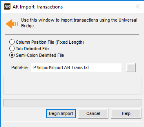
The AR Import Transactions window will appear.

Click thumbnail for larger view of image.
3 Select one of the file types that describes the file you want to import.
4 Type the path and filename in the Path/File field or use the ellipses button to locate the file you want to import.
5 Select Begin Import to start importing the transactions.
After you import transactions, you can edit them in the AR Enter Payments/Adjustments window and then post.
Published date: 12/31/2020