Exporting Stock Items from Denali to 3dCart
If you have stock items set up in Denali, but not in 3dCart, you can use the export feature in the Denali Inventory module to more quickly add stock items to 3dCart. You can export your stock items in a comma delimited file and import them into 3dCart.
CAUTION: We highly recommend you only use this process to initially set up your stock items in 3dCart. If you import files using an option other than Insert Only, the import will overwrite any stock items that exist in 3dCart. |
To export stock items from Inventory:
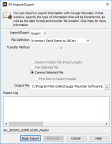
1 In Inventory, select Inventory Items > Import / Export Stock Information from the left navigation pane.

2 From the Import/Export drop-down, select Export.
3 From the File Definition drop-down, select Inventory Stock Items to 3dCart.
4 Use the browse button next to the Output File field to select where you want to save the export file.
5 Click Begin Export.
You can view the file format requirements for 3dCart in the Appendix.
To import stock items into 3dCart:
1 In 3dCart, select Products > Product List.
2 Click the Export/Import button at the top of the screen.
3 In the Import area, click the plus sign to expand the Products section.
4 Depending on your browser, select the Choose File or Browse button and find the Denali comma delimited (.csv) export file you saved.
You can select Sample File to view a sample 3dCart import file to be sure your file format matches 3dCart requirements.
5 After the file you selected appears in the field, select Import Data.
6 Select the import option that meets your needs.
If you select an option other than Insert Only, you will overwrite existing files. See the documentation provided by 3dCart for specific information about these options.
After you import your stock items, you will need to add descriptions, weights, images, and other information in 3dCart.
Published date: 10/11/2021