Printing Inventory Labels
Follow the steps below to print inventory barcode labels for your stock items.
To print inventory labels:
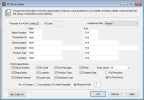
1 In Accounts Payable, select Bill Tasks > Print Inventory Labels from the left navigation pane.
You can print the labels for a specified range of batch numbers, transaction numbers, stock numbers, Product Type, and more. You can also choose to filter the labels using an Additional Filter.

Click thumbnail to view larger image.
2 Click the Print Selections check boxes next to the items you want to print on the labels.
3 If you select the Price check box, select a price level from the Price Level list to print on the labels.
Price levels are established in the IN Stock window (see Overview of Stock Item Pricing for more information).
4 To generate barcodes for your stock labels, select the Bar Code On button and enter the label format and number of copies you want to print.
You must have the Bartender Label Maker program installed to use this option. To order the Bartender program, call Cougar Mountain Sales at (800) 388-3038.
5 You can select the number of labels to print based on either received quantity or on-hand quantity.
If you choose to print based on the received quantity, the number you enter in the box will determine the number of labels printed for each stock item. For example, if you enter 2 in the Received Qty box, you will print 2 labels for each stock item you received. If you choose to print based on the on-hand quantity, the number of labels is based on the current quantity in inventory.
6 Click OK to print stock labels.
Published date: 12/03/2021