Conversion Process
These topics assume you reviewed all of the information in Before Converting to Denali; if this is not the case, please do so before you continue with the conversion process.
To convert existing data for all modules:
1 In Denali, select the Set Up/Select Organization icon from the workflow.
The CMS Set Up/Select Organization window opens.
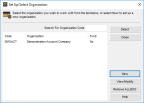
Click thumbnail for larger view of image.
2 In the Set Up/Select Organization window, click New.
The CMS Select Accounting Type window appears.
3 From the radio buttons in the CMS Select Accounting Type window choose if you want to create a Fund or Non-Fund organization type.
After you select OK, the Create Denali Organization window appears.
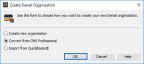
Click thumbnail for larger view of image.
4 In the Create Denali Organization window, select the Convert from CMS Professional radio button. This option is only available in the 32-bit version of Denali.
5 Select OK.
6 Continue with the instructions in CMS Professional to Denali Conversion Settings.
To convert existing data for Payroll only: (only available in 32-bit Denali)
1 Open the Controller module by selecting Start > All Programs > Denali by Cougar Mountain > Controller.
2 When the CMS Select Organization window appears, double-click the organization you want to convert your Payroll data into and log in.
3 Select Organization > Convert Payroll To Denali from the menu bar. If you already installed Payroll into the organization, a message appears that informs you that Payroll is already installed and any data you entered in Denali will be overwritten by the data converted from CMS Professional.
4 Select OK to begin the conversion.
The CMS Professional to Denali Conversion window appears.
The CMS Professional to Denali Conversion window appears.
5 Continue with the instructions in CMS Professional to Denali Conversion Settings.
Published date: 10/24/2019