Cash Drawer Device
If you use an automatic cash drawer, refer to this topic for specific instructions to set it up. In the Cash Drawer Settings section of the Sales Device Codes window, you need to specify the open drawer value and whether or not to input this value as a hex setting.
To define the settings for your cash drawer:
1 In the Sales Device Codes window, enter a code up to six characters and a meaningful description for this device.
2 Select Cash Drawer from the Device Type drop-down list.
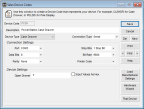
Click thumbnail for larger view of image.
3 Specify the type of connection to the system in the Connection Type drop-down list. For specific information on the options available in this window, see Sales Device Codes window.
4 Refer to the documentation that came with your hardware device to determine the settings for the Connection Settings and Device Settings sections of the window.
5 Click the Test Device button to test the settings for this device. If the cash drawer opened, select Yes. A message appears reminding you to save your settings. If the cash drawer didn’t open, select No. A message appears with suggestions of the most common reasons that the test was unsuccessful.
6 When the test is complete, close the window and select Save to keep the Device Code. Refer to the documentation that accompanied your device to configure the equipment.
NOTE: If you have a cash drawer connected to a parallel port that opens weakly or does not open at all, you might need to change the Device Code settings for that drawer. In the Open Drawer field, add a number between 1 and 255 in front of the existing setting. For example, if your setting is currently 27 112 0 50 50, you could change it to 3 27 112 0 50 50. |
Published date: 11/22/2021