Immediate Payment by Check
Follow the steps in this topic to print a check before you post the bill. If you’re entering a check that you manually wrote and you don’t need to print, leave the Print Check check box unchecked and enter the check number in the Check # box.
If you use positive pay to verify that checks cashed at the bank match those sent by your business, generate the positive pay file after you print your checks. To do this, select Bill Tasks > Generate Positive Pay File from the left navigation pane. You can then send this file to your bank.
NOTE: When you make an immediate payment by check and the GL date and check date are different, Denali will generate and post debit (check date) and credit (GL date) amounts for the liability account on the AP Code attached to the vendor. |
To make an immediate payment:
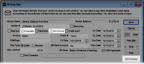
1 In the AP Enter Bills window, if you select either the Paid Out or Immediate check box, the Print Check check box appears.
Click thumbnail to view larger image.
2 Use the Ch Date drop-down calendar to select the date for this check, either when you wrote it or the date you printed it. The default date is the system date.
3 Enter the check number and Bank Account/Cash Account (depending on integration).
4 Enter the rest of the information for this bill. See the window-specific help for information about every option in the window.
5 Click the Print Checks button to print the immediate checks in the batch now or click Save to print them later.
If you defined a custom report for AP Checks in Controller, you can select the Use a custom report check box and then choose the custom report you want to run from the drop-down.
You can use Crystal Reports® to add fields to the check. Refer to your Crystal Reports documentation for instructions.
Published date: 12/03/2021