Creating a New Budget
After you set up your chart of accounts, you can use the GL Budget Management window to create or update budgets. You must have user security rights to Manage Budgets/Expense Controls to create a budget. You can include one or all of your revenue and expense accounts, but each account can only be included in one budget.
Select the Help button in the Budget Management window or any of the Wizard windows for detailed information about the options.
To create your account budgets:
1 In General Ledger, select Chart of Accounts > Manage Budgets from the left navigation pane. The GL Budget Management window will open.
2 Click the Create Budget button.

Click thumbnail to view larger image.
The Budget Management Creation Wizard will open.
3 In the Wizard window, enter a Budget Code of up to 10 characters and a description of this budget.
4 From the Year drop-down, choose the year you’re creating this budget for.
You can choose from the current year to the last year of your fiscal calendar. You will be able to add years to the budget after you create it.
5 Click Next to move to the next Wizard window.

Click thumbnail to view larger image.
6 Choose the radio button that matches how you want to create your budget: Create a new budget from scratch, Copy from a previous budget, or Import from an external file.
7 If you chose to Copy from a previous budget, use the Budget Lookup to select the budget you want to copy from.
If you chose to Import from an external file, enter the filename or browse for the file you want to import.
If you chose to Create a new budget from scratch, enter the range of accounts you want to include. If your accounts are segmented, you can also filter by segment.
8 Click Next.
9 From the Choose Data Source drop-down, select the source of your budget data. The drop-down options will depend on the data available.
10 In the Increase/Decrease Amounts by field, you can choose a percentage amount to increase/decrease the new budget based on the values in the data source.
11 Click Finish.
Click thumbnail to view larger image.
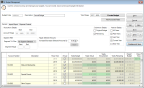
You will return to the main budget window and your accounts will appear in the Budget Grid. If you want to make changes to any of the options you selected in the Budget Wizard, click the Return to Create Budget button. This will open the Budget Wizard with your selections so you can make changes.
You can also make changes to the budget directly in the Budget Grid. If you want to make a global percentage increase or decrease to your accounts, select the accounts in the grid you want to change and use the Increase/Decrease Selected Amounts By option on the General tab. When you click Apply, the selected accounts in the grid will be updated by the percentage you entered.
When the budget is set up correctly, click the Finalize and Save button. This saves the budget and prevents accounts in this budget from being saved in another budget.
Published date: 09/30/2021