Setting Up Submitters
This window lets you set a default vendor for each employee that submits expense reports. Because each expense must have a vendor attached, this can save you a lot of time when you import. All expenses from the submitter will default to the vendor you select, but you can change the vendor for specific expenses during the import process.
To set up your submitters:
1 Select Bill Tasks > Import Bills from Expensify from the left navigation pane.
2 Select the batch you want to import transactions into; it does not need to be an empty batch.
The Import Expenses from Expensify window will open.
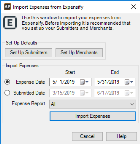
Click thumbnail for larger view of image.
3 Click the Set Up Submitters button to open the Set Up Submitters window.
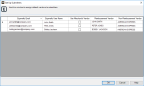
Click thumbnail for larger view of image.
The submitters that autofill come from the currently approved expense reports in Expensify, plus any submitters that have previously been saved in the window.
4 If you want to use the vendor attached to the merchant by default for this submitter, check the Use Merchant’s Vendor check box.
Merchant’s vendors are set up in the Set Up Merchants window.
5 In the Reimbursement Vendor column, enter the default vendor you want to use for expenses that will be reimbursed directly to the submitter.
6 In the Non-Reimbursement Vendor column, enter the default vendor you want to use for expenses that do not get reimbursed to the submitter.
7 Click OK when you’re done.
To delete a submitter, clear the vendors off the line and uncheck the Use Merchant’s Vendor check box. When you save, the row will be deleted. Before you can delete a submitter, all invoices with the submitter’s email attached must be generated.
Published date: 10/11/2021